I was recently asked to do a demo of how I made the wonky log cabin blocks
in this quilt top at my quilt club's summer retreat. Knowing I'd be a nervous wreck(these ladies are Real Quilters), I decided it might not be a bad idea to have something concrete to back up my rambling demonstration. I photographed my process and typed up some directions. I thought I'd share it with y'all as well.
I didn't invent the wonky log cabin(also called liberated log cabin or improvisational log cabin), but I do love to make them! There are several other tutorials out there...this is my method. I make them at 6.5 or 9.5 inches because those are sizes of my square rulers.
What you'll Need:
- A pile of strippy scraps, at least one of the long edges should be trimmed nice and straight. Nearly any width will do. These will be your logs.
- A pile of 2"-4" fussy cut squares for the center.
- rotary cutter
- 6.5" ruler
What You'll Do:
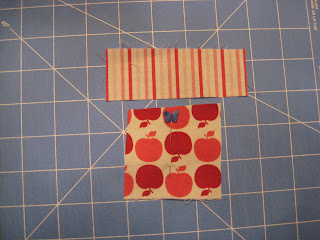
Choose one of your square(ish) shapes and a scrap of fabric for the first "log).
|
 |
| The pin is there to help remind me how the block is oriented |
Lay the log down on your square in a "wonky" manner and sew using a 1/4 inch seam along the outer edge of the log. It might feel weird and uncomfortable to not have your edges lined up. Do it anyway!
Trim away that ugly edge.
You're left with something like this.
Trim the edges.
Repeat this process to continue building your block.
 |
| It's OK if some of the edges are non-wonky! |
If you feel your block is getting a bit out of control, you can trim it up after the first round of logs is complete.
Repeat the process until you have a block that is a bit larger than 6.5". Depending on the width of your logs, your block may have two or three rounds of logs. When completely finished, you'll have something that looks like this. Use your 6.5" square ruler to trim up the block. If you have enough "extra" fabric, you can wonky it up even more! OK, at this point, I should note that I my camera batteries ran down and I don't have the finished block to show you. But I CAN show you a photo of the finished block...I made several of these blocks for a fun table runner!
That's it! Hope you enjoyed and if you make any wonky log cabins using this method, I'd love to see them!
|


2 comments:
I really enjoyed visiting your blog Kellie and appreciate your taking the time to include all the detailed pictures with your instructions. MiMi
Nice tutorial and blog! :)
Post a Comment